Stitching up a better monster
Yanick Champoux (@yenzie)
june 9th, 2017
The nice thing with knowing a technology well, is that you can create a lot of nifty things. The nicer thing with knowing a healthy smattering of technologies, is that with the right amount of cunning and slyness you can gather things here and there and build something that is niftier than the sum of its parts.
Casting on our usecase
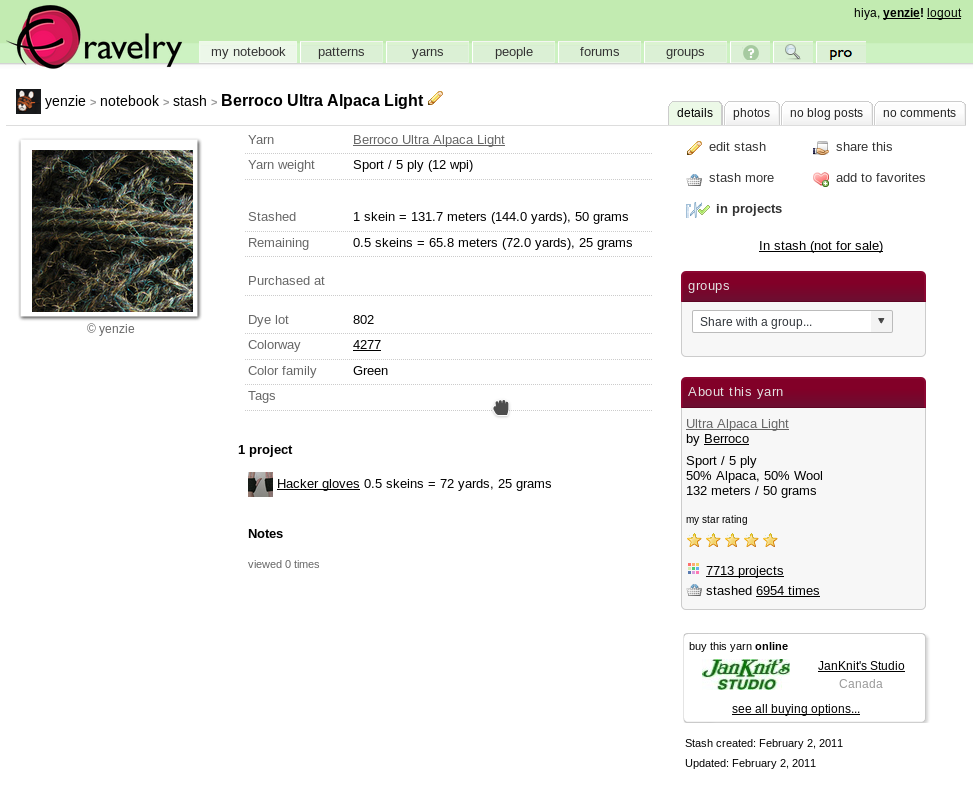
A few years ago my spouse corrupted me into the warm and fuzzy world of knitting. As it happens, there is an awesome website, Ravelry, that is a kind-of Facebook for the fiber world. There are forums, an impressive array of knitting/crochet patterns, both free and for sale, and one can pretty much record all that relates to the craft — past and present projects, lists of needles and hooks one has, details of the yarn stash one possesses, etc.
(Oh yeah, incidentally, I am yenzie on Ravelry, if you ever want to come and say ‘hi!’.)
But I’m getting ahead of myself. Let’s forget about Ravelry for just a moment, and talk about yarn. To the unitiated, the fundamental attributes of a ball of yarn are pretty limited and easy to see: there is a color, and… yeah, a color pretty much sums it up.
To knitters, it’s a little more involved than that. There is the fiber content of the yarn (pure wool? cotton? silk? synthetic fibers?), the size of the yarn itself (fingering, worsted, bulky), the manufacturer, the name of that type of yarn, the colorway and usually the dye number as well (because this black might look like that black, but trust me unless they are part of the same dye batch, chances are they’ll look sliiiiighty different when you knit them together).
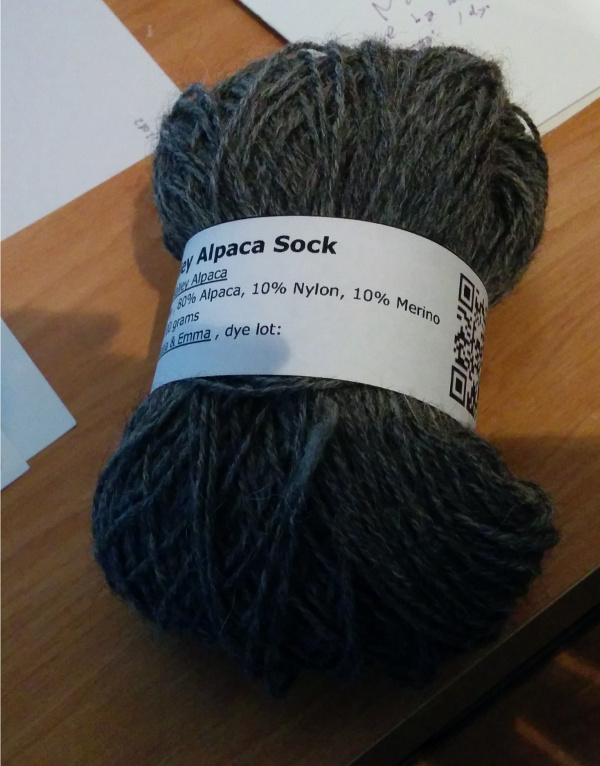
Fortunately, yarn balls always come with a label that holds that good wholesome information. Unfortunately, those labels tend to fall down and disappear from time to time.
Fortunately, (and as I snap my fingers you’ll remember) there is Ravelry and its yarn database, where one can get back all the information that was on that label.

Unfortunately… that’s information that lives in the computer, and we want it in the physical world. Attached to that ball of yarn.
Which makes one think: wouldn’t it be cool if we could just print a new label from Ravelry?
Going off the pattern
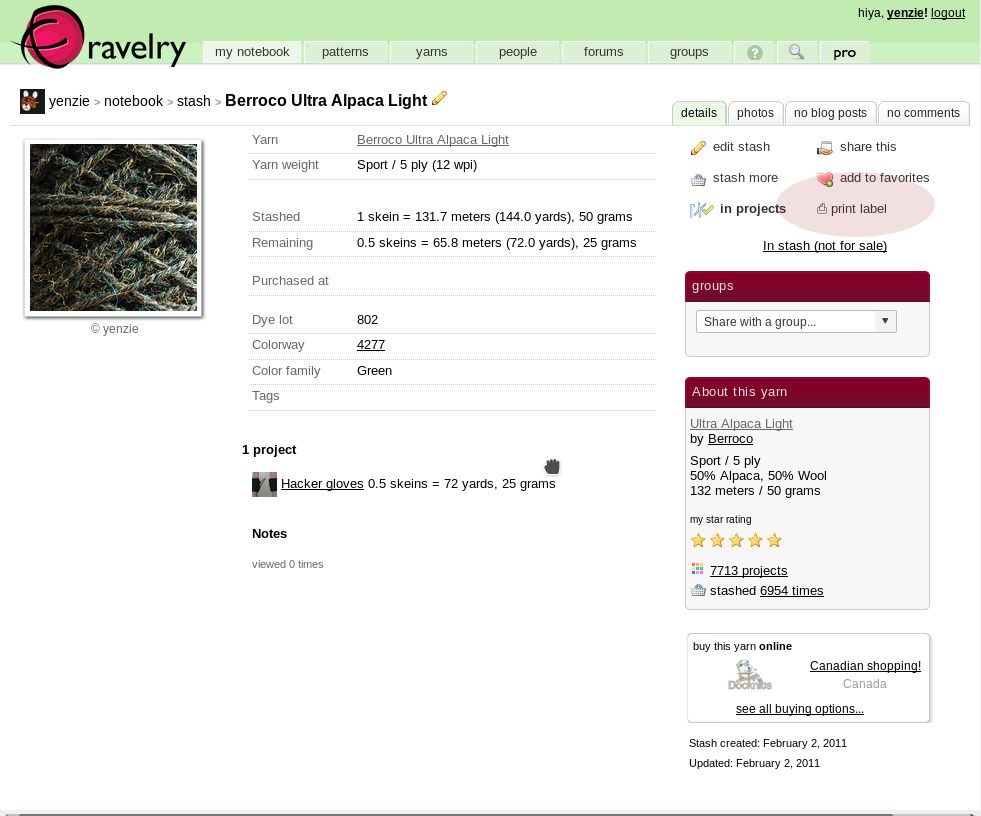
As it stands right now, Ravelry doesn’t generate yarn labels. But all the data is there. All that is needed, really, is to rearrange it in a labelish way.
And this is where the frankensteining begins.
The Firefox add-on Greasemonkey (or
Google’s Chrome equivalent Tampermonkey)
allows you to write JavaScript scripts to tweak webpages. In this
case, it’s not hard to add a print button to a stash page that, when
clicked, will morph the page such that it’ll print as a label band.
Adding sequins. Because, hey, why not?
…but wait! With our little monkeying, we can print out the label. But wouldn’t it be way cool to complete the loop and give ourselves a way back to the Ravelry stash page from that label?
Well, yeah, I know what you’re thinking: we could print the URL of the stash page on the label. And it would work. It’s just… not very magic. How about adding that URL as a QR code instead? That way, one would just have to point their phone’s camera at the label instead of typing that URL.
Happily for us, there are a few JavaScript libraries that implement the creation of those QR codes. We add one of those libraries to the Greasemonkey script, invoke the QR code generation function at the right place… et voilà.


Stitches’ glossary
If you only want to use the script, you can go and get it here. If you want to have a quick tour of how it was put together, keep on reading.
Now, before we start with the code I have to admit I did something funny. As mentioned in the section above, I’ll use an external JavaScript library, kjua, for the generation of the QR code. I’ll also drag in jQuery, because it makes DOM manipulations sooo easy. Greasemonkey has a way to declare dependencies, that will be fetched and cached the first time the script is run.
// ==UserScript==
// @require http://ajax.googleapis.com/ajax/libs/jquery/1.3.2/jquery.js
// ==/UserScript==
but instead of relying on that mechanism, I decided to bake the dependencies straight alongside the script, using webpack. There is no strong argument for going that route… except that with webpack I can use most of the new EcmaScript syntax, and have it automatically transpiled into common JavaScript. If you want to have a peek at the webpack configuration I used, it’s all in the script’s GitHub repository.
The final script itself is pretty straightforward. First, I bring in the libraries that will do all the work for me.
import jquery from "jquery";
import kjua from "kjua";
Then I inject the new print button.
jquery('<a href="#" />')
.addClass("button")
.append("<span>⎙ print label</span>")
.on("click", show_label)
.insertBefore("#stash_owner_button_set div.c_d");After that, we need a function collecting all the information we want from the page itself.
function gather_info() {
  let info = {};

  let stash = (info.stash = {});

  stash.name = jquery("#content .heading h2")
    .contents()
    .map(function() {
      // make sure it's a text node (type==3)
      return this.nodeType == 3 ? this.nodeValue : undefined;
    })
    .get()
    .join("");

  jquery(".core_item_inner .fields div.field").each(function() {
    stash[
      jquery(this)
        .children("label")
        .text()
        .toLowerCase()
        .replace(/ /g, "_")
    ] = jquery(this)
      .children(".value")
      .html();
  });

  let yarn = (info.yarn = {});

  jquery("#yarn_summary .yarn_summary .yarn_summary_content div").each(
    function() {
      yarn[jquery(this).attr("class")] = jquery(this).html();
    }
  );

  return info;
}
Finally, the function that ties them together and generates the label itself.
function show_label() {
  let info = gather_info();

  let template = `<div class='label_strip'>
      <div style='display: flex; flex-direction: row;'>
        <div class='label_info' style='text-align: left'>
        <div id='stash_name'>${info.stash.name}</div>
        <div>
          ${info.yarn.yarn_name}
          ${info.yarn.yarn_company}
        </div>
        <div>
          ${info.yarn.fiber_and_weight},
          ${info.yarn.fibers}
        </div>
        <div>${info.yarn.yardage}</div>
        <div>
          colorway: ${info.stash.colorway},
          dye lot: ${info.stash.dye_lot}
        </div>
      </div>
      <div id='qrcode' />
    </div>`;

  jquery("body")
    .html(template)
    .attr("class", "")
    .append("<style>@media print { @page { orientation: landscape } }</style>");

  document.querySelector("#qrcode").appendChild(
    kjua({
      text: window.location.toString(),
      size: 100,
      crisp: true
    })
  );

  jquery(".label_strip").css({
    "padding-left": "25%",
    "margin-top": "3cm",
    border: "1px solid black",
    margin: "0.3cm",
    "padding-top": "0.3cm",
    "padding-bottom": "0.3cm"
  });

  jquery(".label_info").css({
    "margin-right": "0.5cm"
  });

  jquery("#stash_name").css({
    "font-size": "large",
    "font-weight": "bold"
  });
}
That’s all there is to it! Again, if you want to have a longer peek, or perhaps even want to fork the code, it’s all on GitHub. Enjoy!
Tags: technology javascript knitting